
How to add a website to ClickStar and earn from push subscriptions — detailed instruction
Webmasters, who are beginners frequently face the difficulties associated with connecting the website with the system for monetization with push notifications subscriptions. This article discussed in details how to add the website to our platform and start earning.
Contents
1. Registration at the Platform
2. Addition of Website into the System
Registration at the Platform
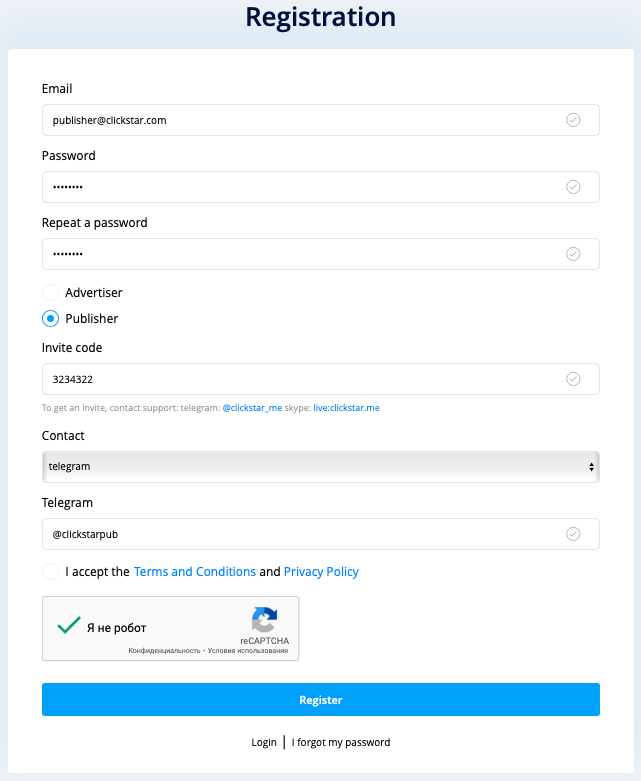
In order to monetize your traffic, it is required to register in the system as Webmaster, which can be done by clicking “Yes, I want to register” button at the main page of website https://clickstar.me/. At the next page, you are required to fill up all required fields and press “Register” button. You can request for registration invitation from your personal manager (Telegram @clicknik, Skype live:.cid.baed75d9716ff1cb).
Template of filling up the registration form:
Addition of Website into the System
In order to add your website in ClickStar, you are required to access “Websites” section and press “Add a Website” button:

After that you will see the interface of your website settings:
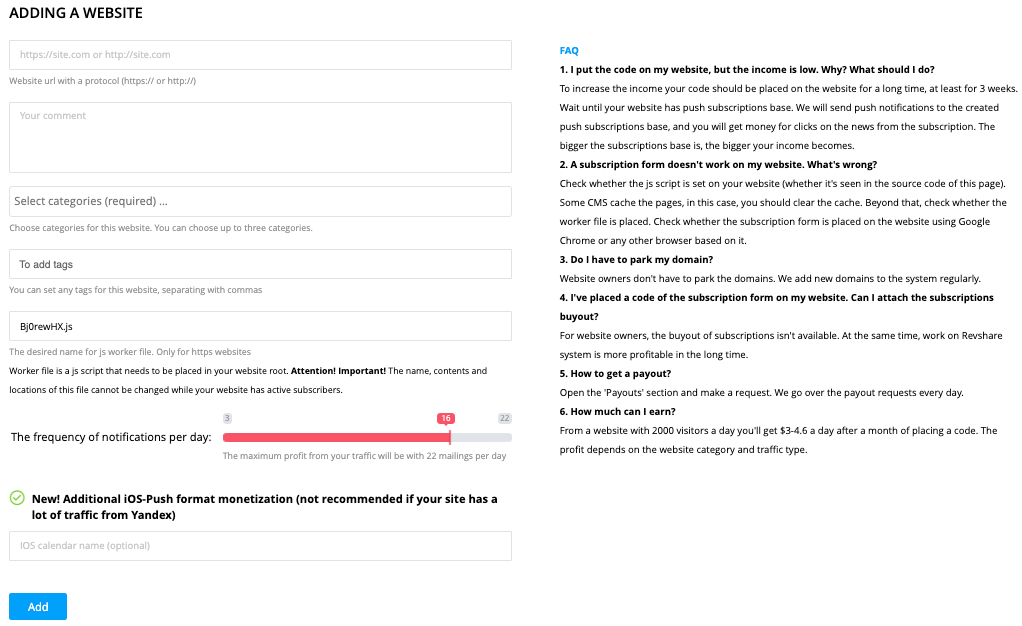
Next, you are required to fill up your website address, website description (e.g., information portal about mobile games), select website category (if you haven’t found the suitable category, select “Internet”), specify tags if necessary (they will be displayed next to your website name in the list of websites inside system) and specify the number of mailing lists per day for your website users (maximum profit from your traffic is achieved with 22 mailing lists).
Example of a correctly filled form of website settings:
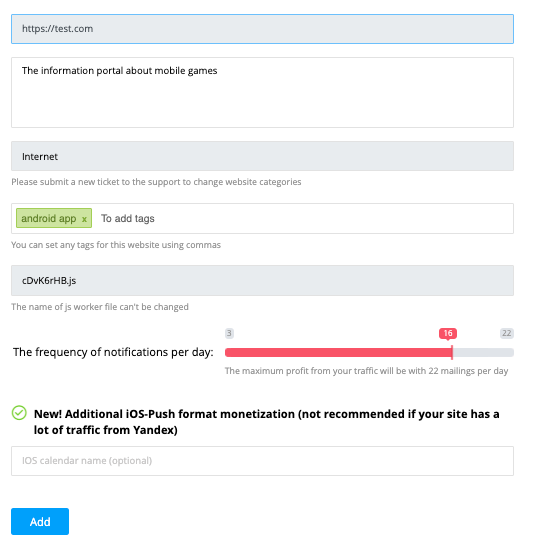
After that, press “Add” and then your website will be added into the section for confirmation.

Next, press “Confirm” button and select the most comfortable method of confirming your website:
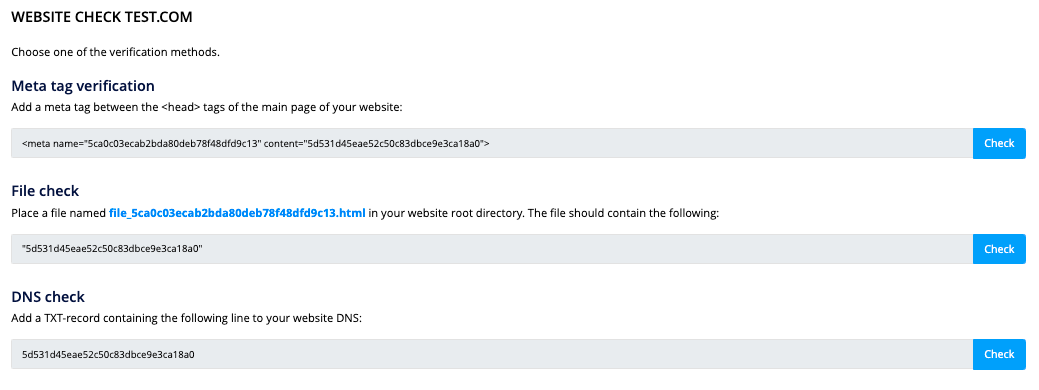
The simplest option is confirmation of website via addition of TXT-record at your domain registrar or proxy service, like CloudFlare, in DNS settings.
Example of adding TXT-record in CloudFlare:
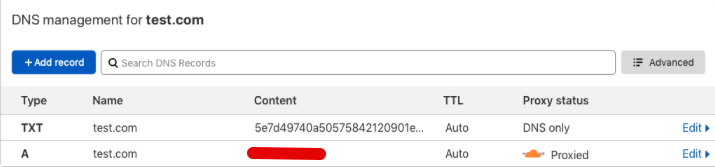
After adding this record, press “Verify” button next to selected method, and your website will be successfully confirmed and displayed in the “Waiting for Confirmation” section.
After some time, once the website is moderated, you will be able to proceed with adding ads code to the website by clicking “Ad code” button next to your website inside the “Websites” section:

Press “Add block” at the next page. Depending on your website type (http or https), select the type of settings for opening the window of push notification subscription. If your website supports https protocol, you can select any of 2 setting types. If your website supports only http, you can select only “Push subscription (2click constructor)” type, which considers completion of subscription in just 2 clicks. In case of “Push subscription (1click)” settings type, your subscription will be completed in 1 click.
Let’s have a closer look at the first type of settings with subscription in 1 click. You will have access to the following options:
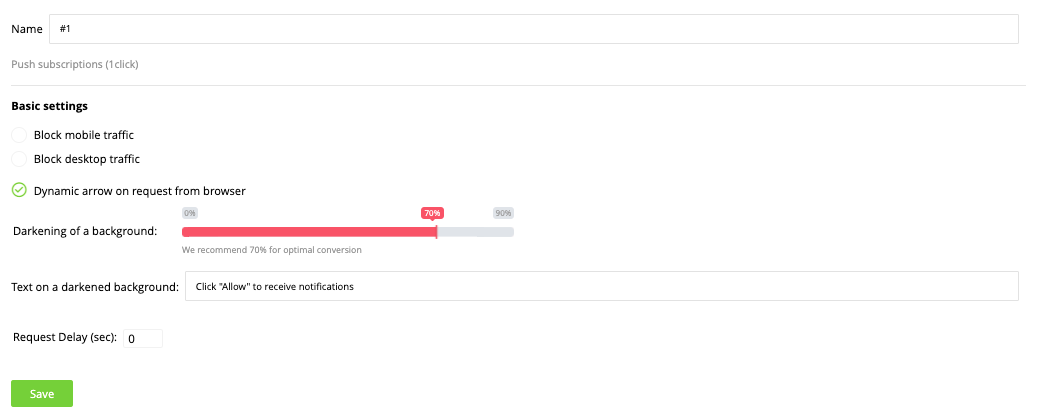
You can block subscription requests for various traffic types, add or remove an arrow that points for a user to the subscription window, darken the background at your website with respect to request window and alter the text at this background. In addition, you can also display subscription request with a certain delay. We recommend to save the default settings.
After completing the settings, press “Save” button and receive a code at the next page for integration at your website by pressing “Get a code” button.

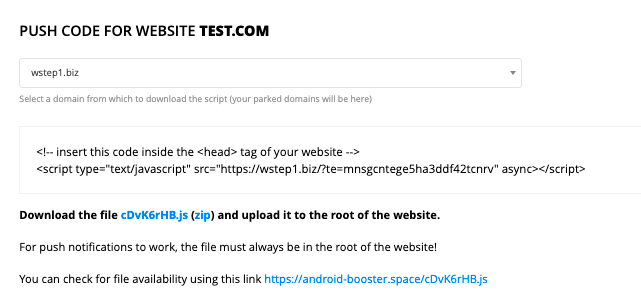
Next, you are required to paste the received code inside the <head> tag of your website, and also upload a worker-file inside the root directory of website.
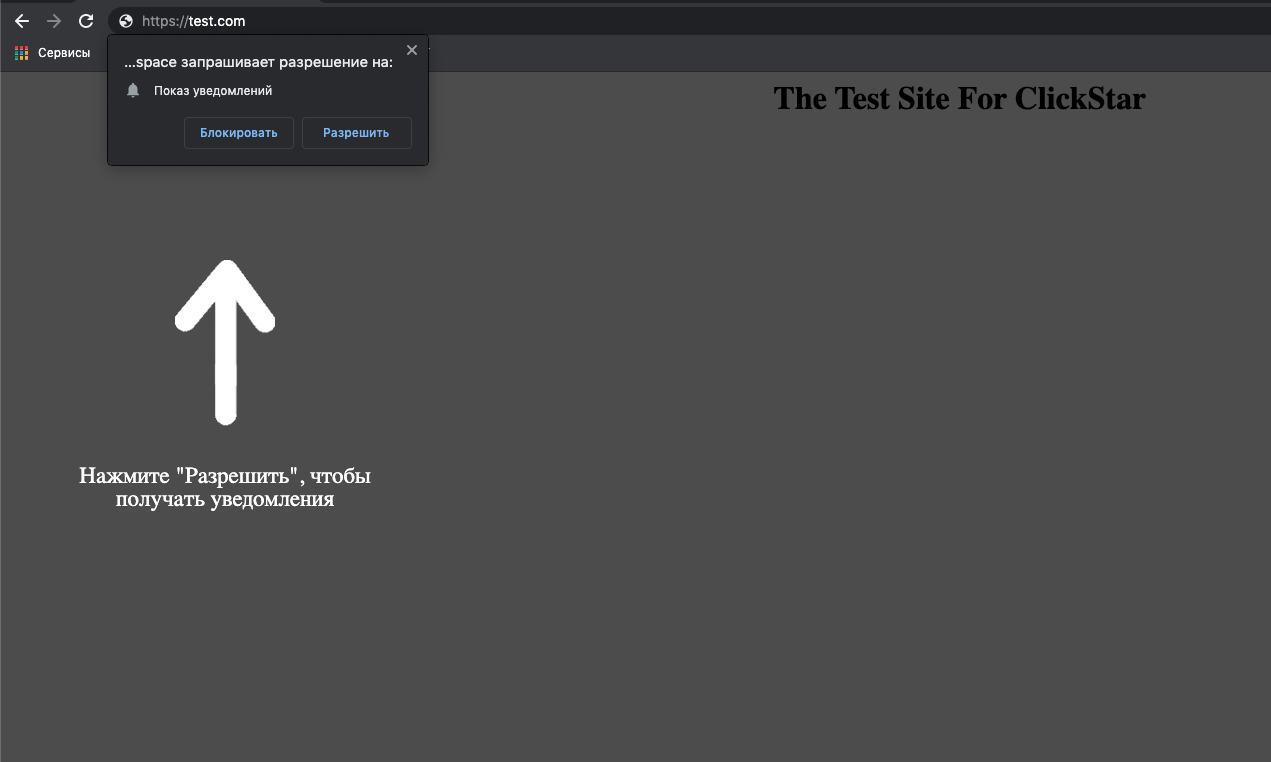
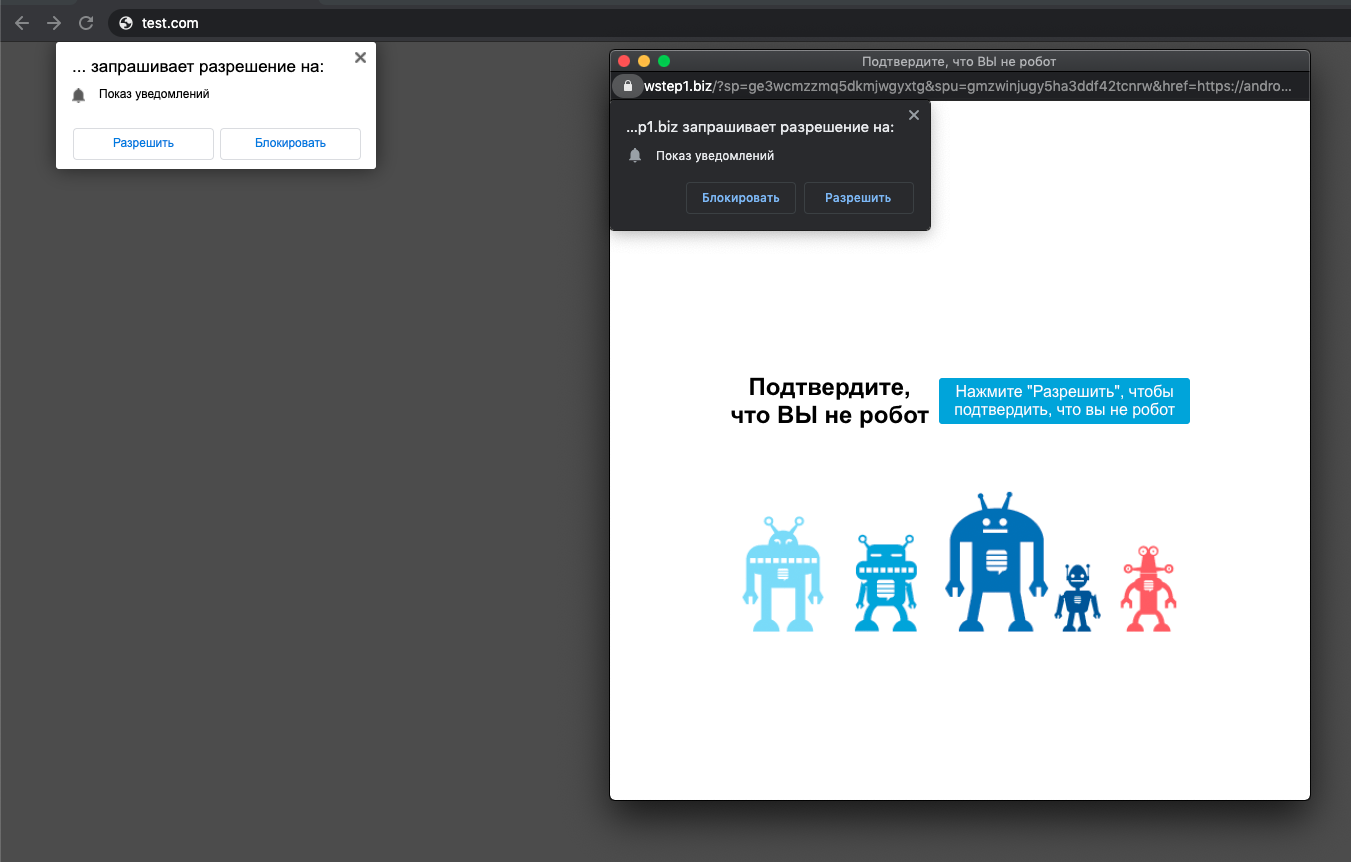
If everything was done correctly, then a request for push notification subscription will appear at your website:
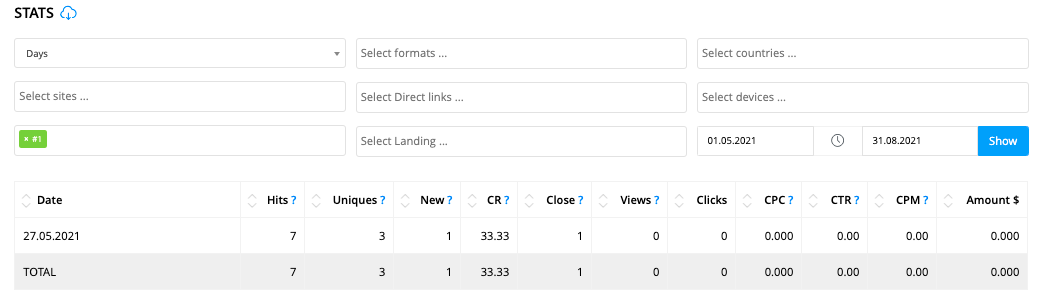
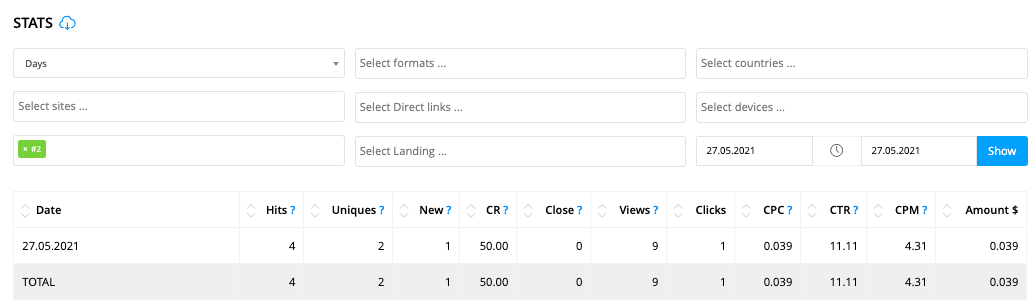
All set! Your website has been successfully added into your system. For testing purposes, you can subscribe for a mailing list and test your subscription inside the statistics section https://clickstar.me/publisher/stat:
Let’s discuss the second type of window settings for push notification subscription request with 2 clicks. User subscription in this case will be carried out inside the pop-up window at your website or in a new tab. You have got the following options for settings:
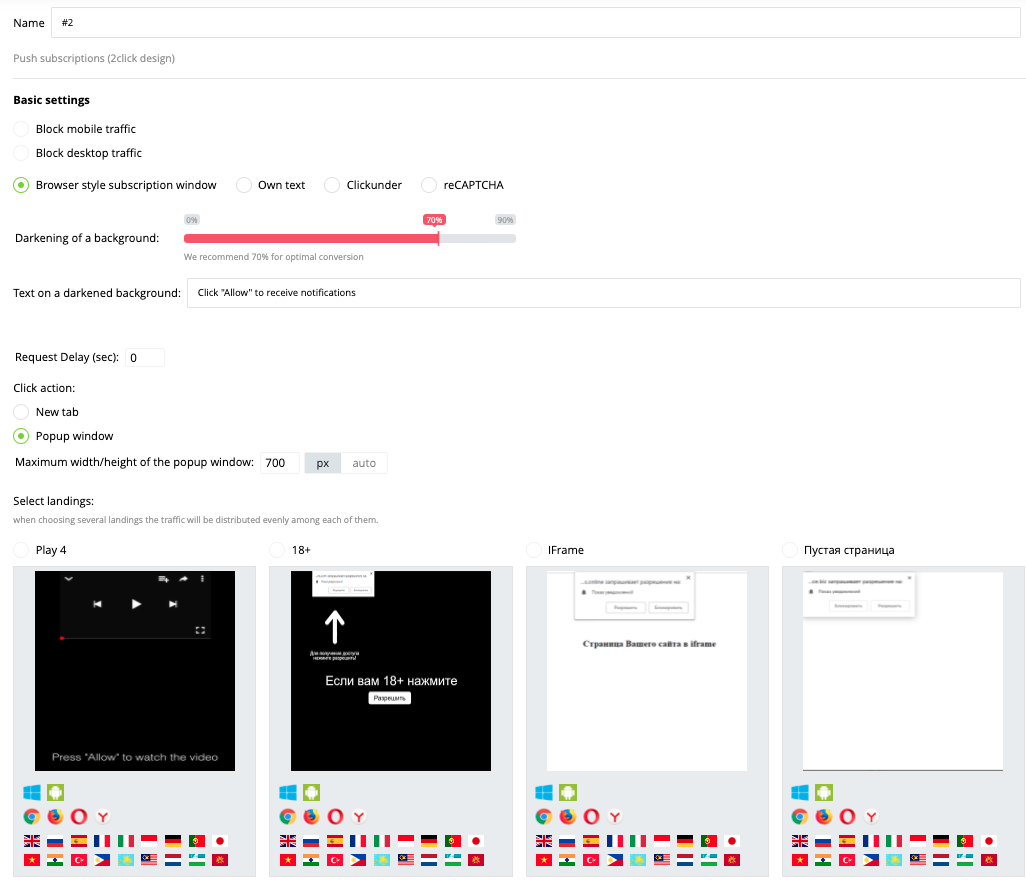
You can block subscription requests for various traffic types, alter the style of displaying the window of push notification subscription request, alter the text at the darken website background, set the delay in displaying this window and set the width and height in pixels of an opening landing.
We recommend to save the default settings and select any suitable for you landing, where user will be subscribing for mailing list.
After completing code settings, press “Save” button and receive a code at the next page for integration at your website by pressing “Get a code” button.

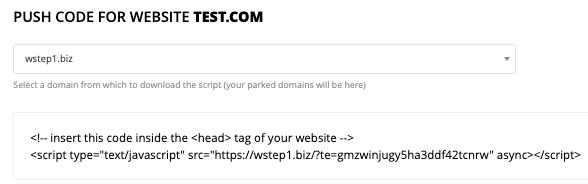
Next, you are required to paste the received code inside the <head> tag of your website.
If everything was done correctly, then a request for push notification subscription will appear at your website:
All set! Your website has been successfully added to our system. For testing purposes, you can subscribe for a mailing list and check your subscription inside the statistics section https://clickstar.me/publisher/stat:
We have completed the discussion of a process of adding your website to our system, starting from registration and up to receiving first subscriptions in statistics. However, if you are still unclear about one of the discussion points or have got other questions, please do not hesitate to leave us comments and will do our best to help you!