
Buy iOS Calendars — Instruction to Create a Campaign
A lot of advertisers quite frequently get questions about how to purchase iOS Calendars traffic at our site. This article provides a detailed overview of all stages related to this topic, starting from the registration and all the way until launching your first advertising campaigns.
Contents
1. Registration at the Platform
2. Add Funds to Balance
3. Creation of Advertising Campaigns
4. Creation of Push Notifications Advertisements
5. Common Recommendations
Registration at the Platform
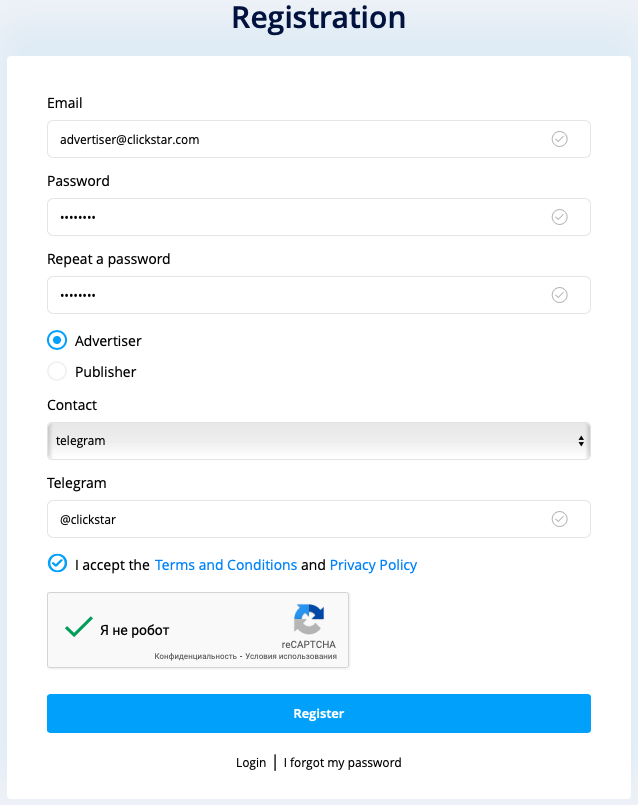
In order to buy IOS push traffic, first of all it is necessary to register in the system as an advertiser. In order to do that, please press “Yes, I want to register” button at the website’s main page, then fill up all necessary fields on the next page and press “Register” button.
Completed Registration Template:
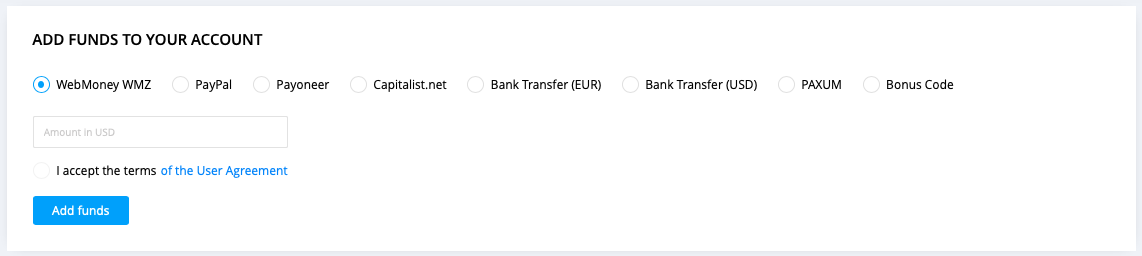
Add Funds to Balance
In order to launch advertising campaigns and start receiving first clicks from your hyperlinks, it is necessary to add funds to your account balance in the system. All actual add funds methods are available at https://clickstar.me/payments/pay webpage. At the point of completing this article, the advertising office includes the following add funds methods:
— Webmoney
— Capitalist.net
— Bank Transfer
— PAXUM
— Payoneer
— Paypal
Minimum first deposit amount is 200$ and 50$ for all subsequent top-ups.
It is also important to point out that our system is also balance-dependent, which functions based on the following levels:
Below 200$
Below 150$
Below 100$
Below 50$
The lower the level, the less traffic will be released by the system. Hence, the recommended amount for the first top-up — 300$. This amount will allow you to test the traffic without any sort of limitations.
After deciding on the amount and add funds method, please select the preferred method and key in the necessary amount at the balance top-up form, then press “Add Funds” button and follow the listed instruction.
Creation of Advertising Campaigns
Once the registration process is complete and funds have been added to balance, now we can proceed with creating your first advertising campaigns. In order to start, please open https://clickstar.me/campaigns webpage and press “Create Advertising Campaign”. After that you will see the campaign settings interface:
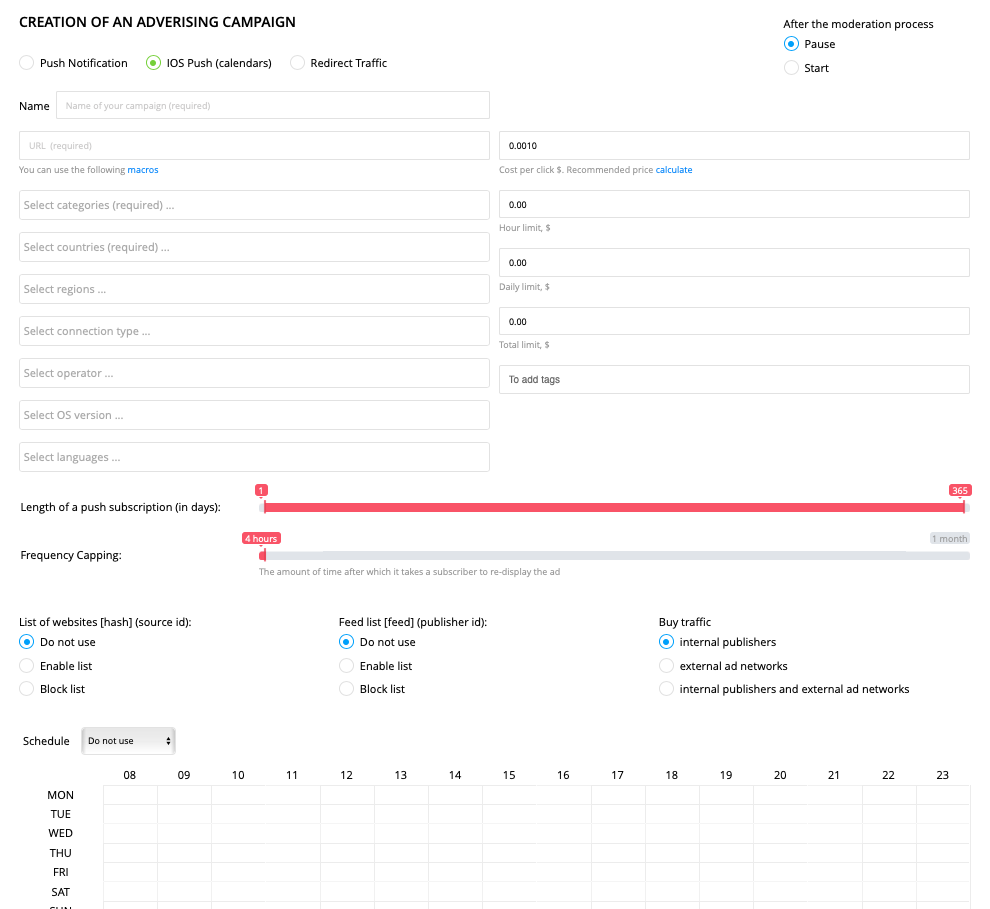
There are 3 types of Advertising Campaigns in our system: Push Notification, IOS Push (calendars), Redirect Traffic. By default, Push Notification type is selected. In order to purchase IOS traffic, select the “IOS Push (calendars)” type, as per the screenshot above.
Next, you need to fill up the campaign name and URL. There are following tokens provided for URL in the system:
[feed] — identifier of traffic stream in our system
[hash] — identifier of website / platform in our system
[creative] — identifier of advertisement material
[campaign] — campaign ID
[ip] — user IP
[country] — country code of a user
[platform] — device platform of a user
[browser] — browser of a user
[price] — price for which a click was purchased
[clickid] — click identifier in our system
[subday] — subscription length
[fcap] — notifications display frequency
Furthermore, you are required to set up the parameters of campaign targeting. You will have access to the following settings:
— By countries
— By regions
— By connection type
— By operators
— By versions of operating systems
— By languages
— By length of push subscription (specified in days, from 1 to 365, e.g., when selecting from 3 to 10, all displayed notifications will be older than 3 days and not older than 10 days)
— By websites / platforms (Black/ White lists — filled by identifiers received with help of [hash] macros)
— By streams (Black / White lists — filled by identifiers received with help of [feed] macros)
— By schedule (limitations of temporary targeting of notifications display; hours are specified based on the time zone of a user)
— By display frequency (limitation of display frequency to a user is specified in hours)
Parameters necessary to be filled, are marked as “required”. If any of the parameters is not set, it will cause the traffic to come from all targets available for this parameter, e.g., if “regions” target is not set, then traffic will be coming from all available regions of a selected GEO location.
After setting all targets, you are required to specify the traffic price. Our estimator will help you here – all you need is to press “Calculate” button and estimator will show an average and max price based on your settings:
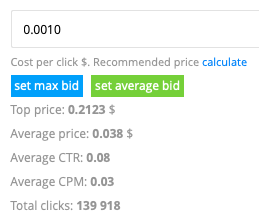
Afterwards, press “Set max bid” or “Set average bid” depending on your preferences. It is important to point out that IOS traffic auction functions based on CPC, which means that “Top Price” specified in the estimator, will be receiving 90% of total traffic volume in the auction. Hereby, if your aim is to collect large traffic volumes from your targets, then make sure to always select “Set max bid”.
Next, select the action that will happen to the campaign after moderation (will be paused or proceed with work), and set all budget limits for campaigns (if that is necessary). Important note: budget limits function based on the same principle as balance-dependent, i.e., it limits the speed of receiving traffic based on the following levels:
Below 200$
Below 150$
Below 100$
Below 50$
The lower the level, the less traffic will be released by the system. Hence, if you don’t want to cut down on volumes, then it is best that you set your limits not less than $210.
After setting the limits, press “Save changes” button.
All set! You have just created your first campaign. Now the campaign will be displayed in the https://clickstar.me/campaigns section and will be marked as “On moderation”.

Ater completing the moderation, your campaign will be marked as “Works” or “Paused” depending on selected action in campaign settings.
Creation of Push Notifications Advertisements
After completion of the moderation process you can proceed with uploading push notifications advertisements by pressing “Ads” button next to the advertising campaign where you want to add the advertisement and press “Add ads” on the next page. After that a form for uploading advertisement will be displayed:
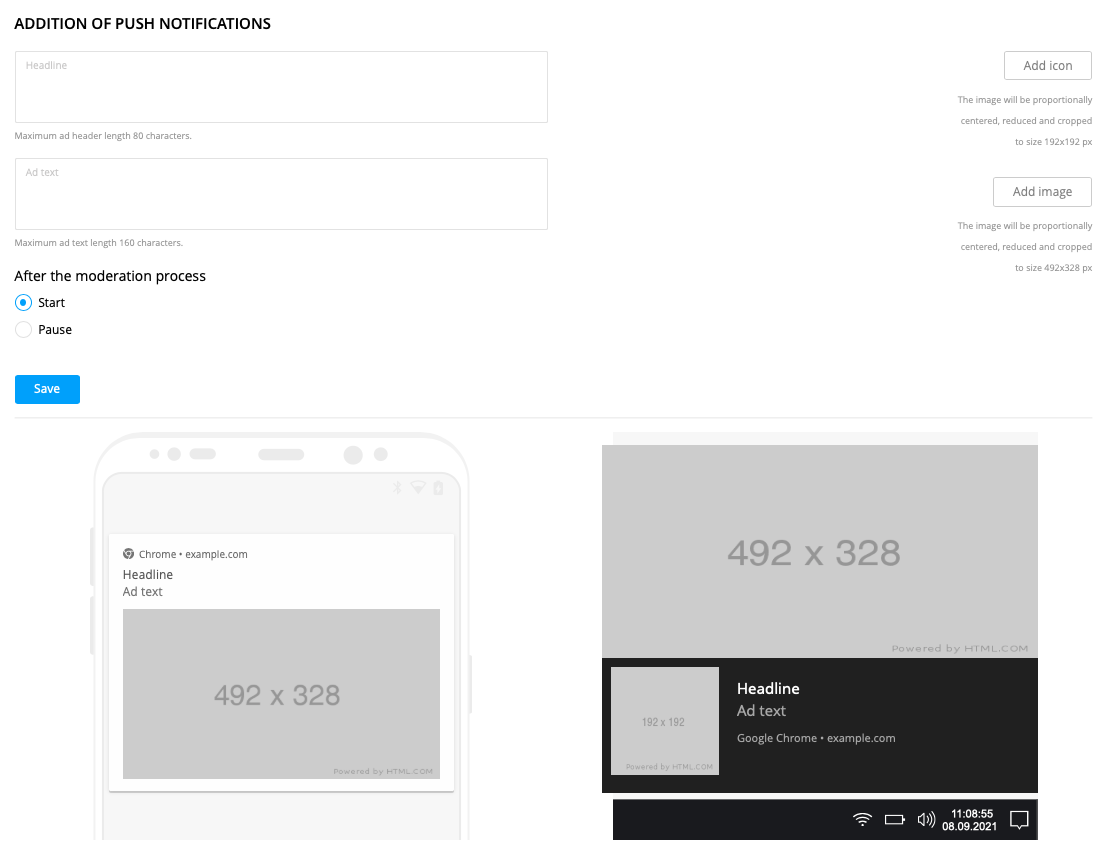
It is worth pointing out that there is no requirement to upload icon and big image! There are no images displayed at the users’ devices, only Headline and Text get displayed. User can see only a Headline inside the push notification at the first screen, whereas after tapping on the push notification, user can see the text itself.
Display example:
“Headline” and “Notification Text” fields are required to be necessarily filled.
Next, select an action for the notification after moderation is complete (launch or stop) and press “Save” button. Now the push notification will be displayed in the “Ads” section of a specific campaign and will further proceed to moderation.
Once the moderation is complete, the advertisement will have a “Works” status and now you are completely ready to receive first clicks for your campaign!
Important note: it is recommended to upload 16 active ads and more for the IOS campaign. It will allow you to occupy more spots inside the user’s calendar and hence purchase more traffic.
Common Recommendations
Our system has a specific set of features and advantages for purchase of IOS calendar Notifications traffic and hence, we would like to provide some recommendations in this section for more successful launches of your advertising campaigns.
Recommendations List:
— beforehand, familiarize with volumes and prices of traffic for each GEO at https://clickstar.me/capability webpage
— upload from 10 to 20 active advertisements for your campaigns
— ensure your bids correspond to the recommendations of estimator, if your bids are much lower than average, then you are required to increase your bids to average values
— compare your CTR and CPM indicators with average values from estimator, and in case if your values are much lower than top values, then you are required to increase your bids closer to the top values
— break down campaigns by subscription length within one GEO and OS based on the following:
1 campaign — target for the first day only
2 campaign — target for the second day only
3 campaign — target for the third day only
4 campaign — target for the fourth day only
5 campaign — target for the fifth day only
6 campaign — target for 6-14 days
7 campaign — target for 15-30 days
8 campaign — target for 31-365 days
Afterwards, set all necessary targeting and then define recommended bid for each campaign from estimator.
— maintain account balance above 200$, because once it falls below 200$, the system starts limiting the speed of traffic reverse.
If you have completed all the recommendations, but it still didn’t help you to increase the traffic volumes, or in case if you have any additional questions, please do not hesitate to leave us comments and will do our best to help you!