What is Smart Bidding or Auto Optimization of Campaigns and how to use them correctly?
This article provides a detailed overview of Smart Bidding and discusses the most popular scenarios of its application, and also demonstrates all stages of setting Smart Bidding for automatic optimization of campaigns.
So, what is Smart Bidding? Smart Bidding — is a tool that allows to carry out optimization of advertising campaigns in auto mode, by adjusting certain rules according to which Smart Bidder will be performing the optimization. This feature significantly eases the work of advertisers during the process of creating black and white lists, while saving your time during setting the detailed bidding for each site in campaign.
Contents
1. Main Scenarios of Use
2. Application Field
3. Smart Bidder Settings
4. Common Recommendations
Main Scenarios of Use
There are plenty of different scenarios of smart bidder use, however it is worth pointing out two major ones:
1) CPC optimization at sites in order to receive conversions with a proper price (such actions as Reduce / Increase bid in the bidder).

2) Auto blocking and activation of sites (such actions as Add in Enable/Block list in the bidder).

We will have a more detailed review of setting each type in the “Smart Bidder Settings” section.
Application Field
Generally, Smart Bidding is frequently used in cases when your offer has got the most simplest flow of conversion and relatively low lead price, because the more optimization data is owned by a bidder (number of leads, clicks, displays etc.), the more consistent its performance will be.
The list below includes offers, which we recommend to use Smart Bidding with:
1) 1-click subscriptions
Landings examples:


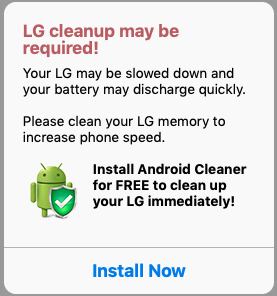
2) Installation of mobile applications
Landings examples:

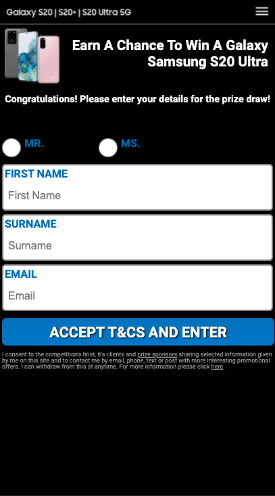
3) Sweepstakes for SOI model
Landings examples:

4) Any offers with a short registration form (for further contacting), for example applications for microlending, binary options, COD-offers etc.
Smart Bidder Settings
First of all, in order to start using Smart Bidder, you are required to set up the conversions tracking in ClickStar (you can find more information about how to do it in our article called “Conversions Tracking”). Next, it is required to set the rules, according to which the system will be optimizing your campaign.
Let’s have a look at simple rules settings, which will be adding sites to black list. Imagine a situation, whereby you have got an offer with $1 payout and $0.01 price per click. Our task is to set the rules in such a way, that will help to avoid excessive expenses for unfit sites.
First of all, let’s activate black lists in campaign settings:
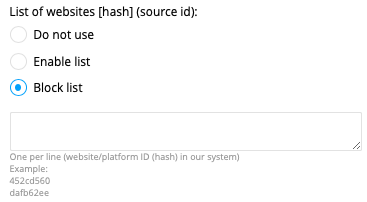
Next, press “Create bidder” button:

Now you can proceed with bidder settings:
— Enter the name
— Specify the campaign, where the rule will be applied
— Set the refresh frequency to 1 hour (in case if conversions are executed without delays)
— Select “Work with hash”
— Create your first rule. Since the click price is 0.01$, then we are ready to test one price (1$) of a lead for 1 hash. Hereby, let’s create a rule related to clicks and conversions with the following condition “if the number of clicks is more or equal to 100 and number of goals is <1, then add hash to blacklist”:

— Press “Create”
The first “defensive” rule is ready. It will help us to filter out platforms without goals in auto mode.
Let’s add another “defensive” rule set in the following manner:

This rule will block all platforms with negative ROI. With help of such an unsophisticated approach we have saved our precious time and reduced excessive expenses for unfit platforms.
Let’s have a look at one more way of using Smart Bidder for fine tuning bid setting across sites. This settings type will allow you to achieve maximum traffic amount across sites, which operate with positive ROI, while reducing expenses for sites that cannot cover the expenses or even making them profitable.
For example, let’s have a look at the case above — offer with $1 payout and $0.01 price per click. Let’s assume that we are ready to purchase the maximum traffic amount with ROI around 20%.
Let’s take the first campaign rule from our previous case and keep it without changes (if the number of clicks is more or equal to 100 and number of goals is <1, then add hash to blacklist).
After that, let’s modify the second rule from previous case in such a way that site cannot be added to black list anymore, but instead its bid will be reduced. This rule will help us to achieve the price that is favourable for traffic purchase from this hash. Let’s set up this rule in the following manner:

This rule will be reducing the site’s rate with a step of $0.001until the conversion price does not drop below $0.8, which will allow you to purchase the traffic from this site with a positive ROI of 20%.
Let’s add the last rule that maximizes the amount from sites that are already becoming profitable. The settings will be adjusted in the following manner:

This rule will be increasing the site’s rate with a step of $0.001 until the conversion price does not reach $0.8, which will allow you to purchase the maximum traffic amount from this site with a positive ROI of 20%.
Common Recommendations
Summarizing everything discussed above, we would like to point out the following recommendations for the most appropriate functioning of Smart Bidding tool:
1) Use auto optimization in campaigns with the simplest flow of conversion. The most suitable are: installations of mobile applications, 1-click subscriptions, sweepstakes and offers with simple registration form.
2) Do not use landing rotator in your campaigns.
3) Do not use various angles of ads within one campaign. If you want to test various approaches for your ads with active smart bidder, then it is best to segregate all angles to different campaigns.
4) Work with hash, but not feed, since there may be several hashes of different quality within one feed.
In case if you have any additional questions related to Smart Bidding, do not hesitate to ask us in comments section and we will do our best to help you!

